Replacing DynDNS with Route 53 >>>
Creating DNS Entries in Route 53
Create AWS Account
The first task is to create an AWS account. Did you know you can get a 12 month free trial if you sign up here
Create Route 53 Hosted Zone
After you have completed the account registration process, go to the console and create a hosted zone for your domain.
There are excellent guides available that talk you through this process here, I have reproduced an abridged version below
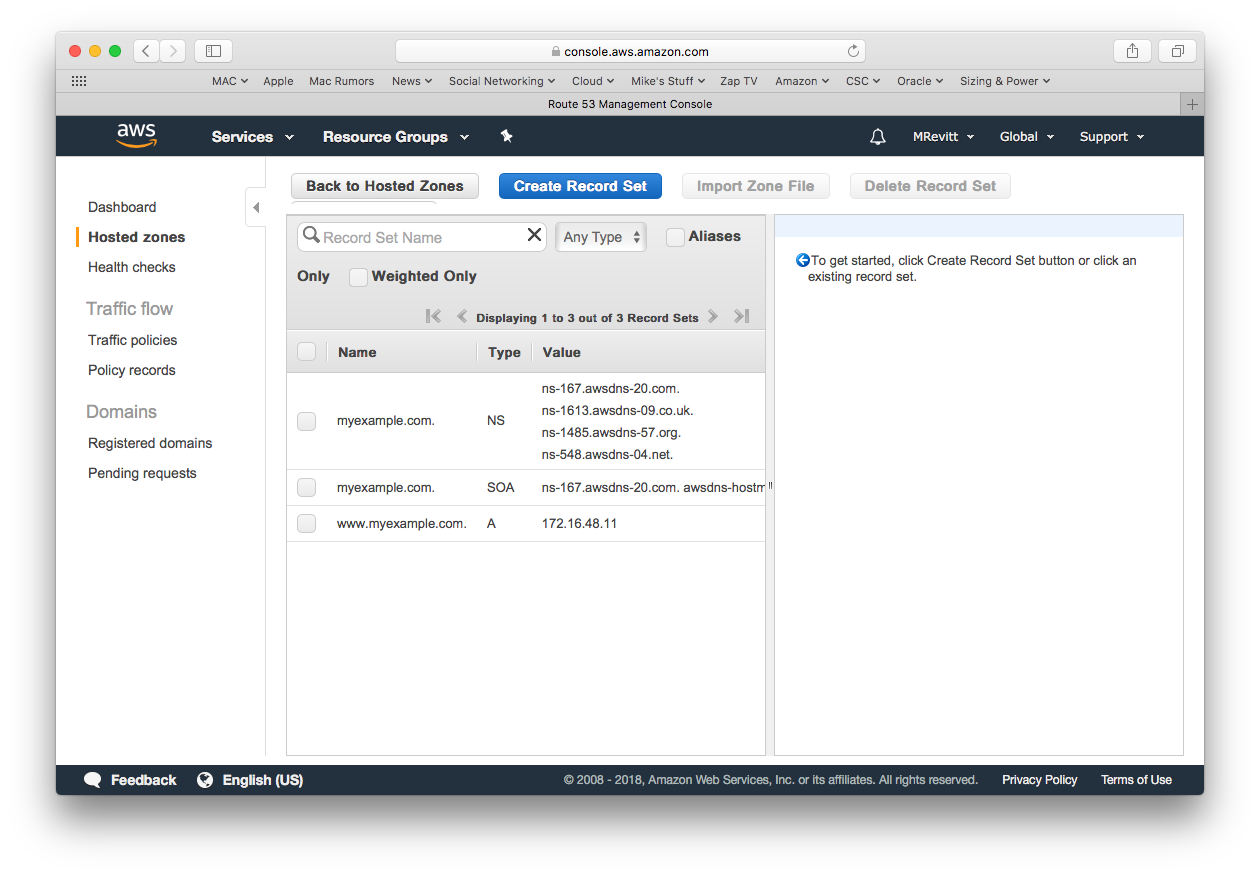
Once in the Route 53 Dashboard, press the Create Hosted Zone button and enter your domain name
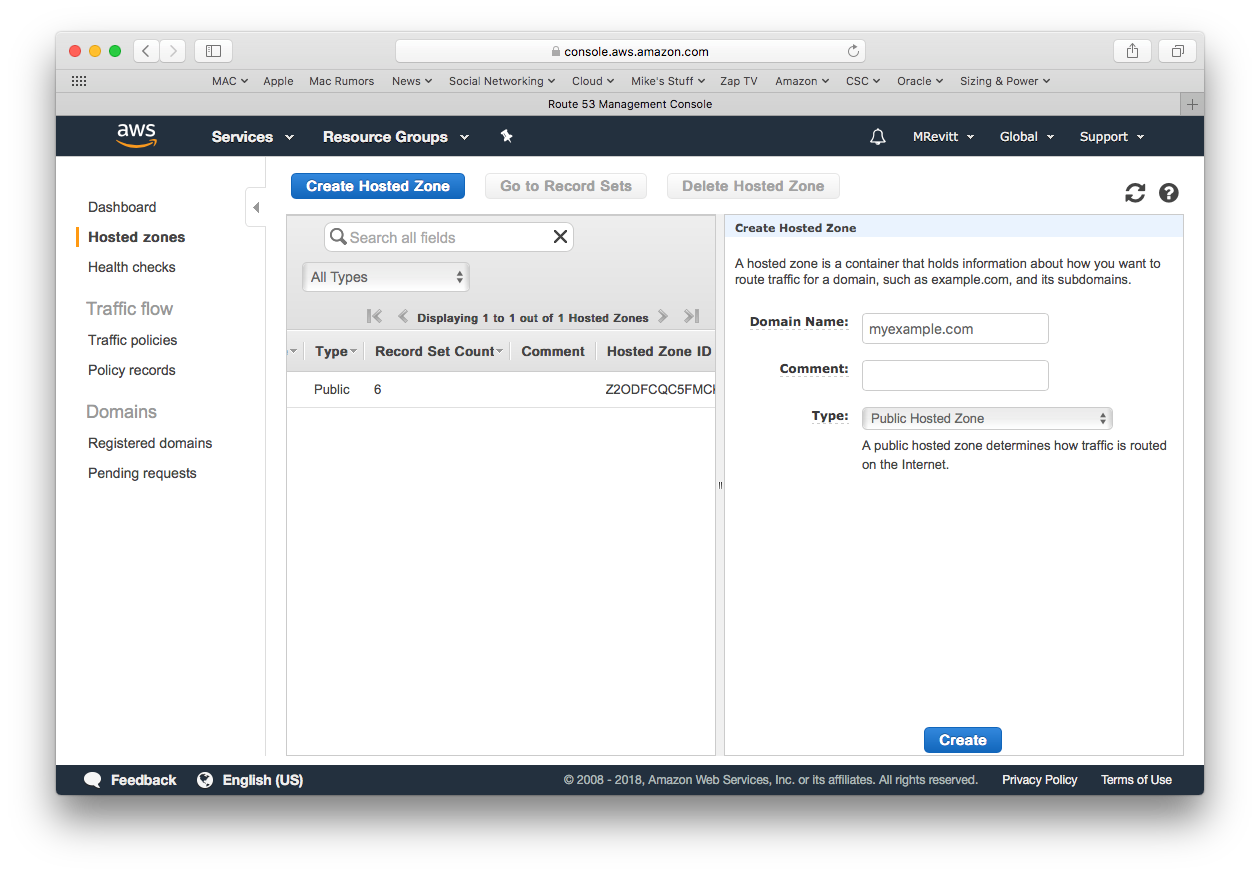
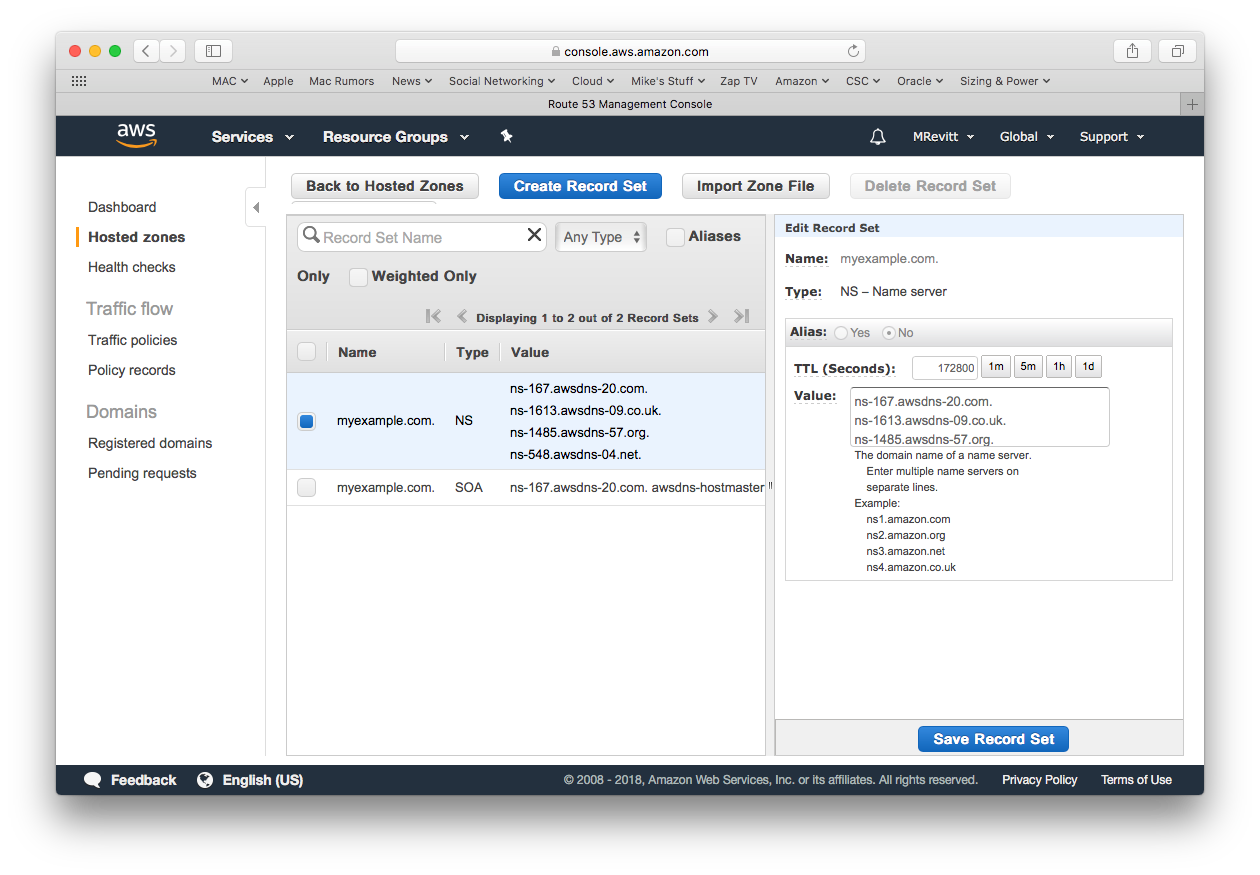
Then press Create, which will create the NS and SOA Record Sets for you.
Note that you will need the name servers in the NS Record Set later.
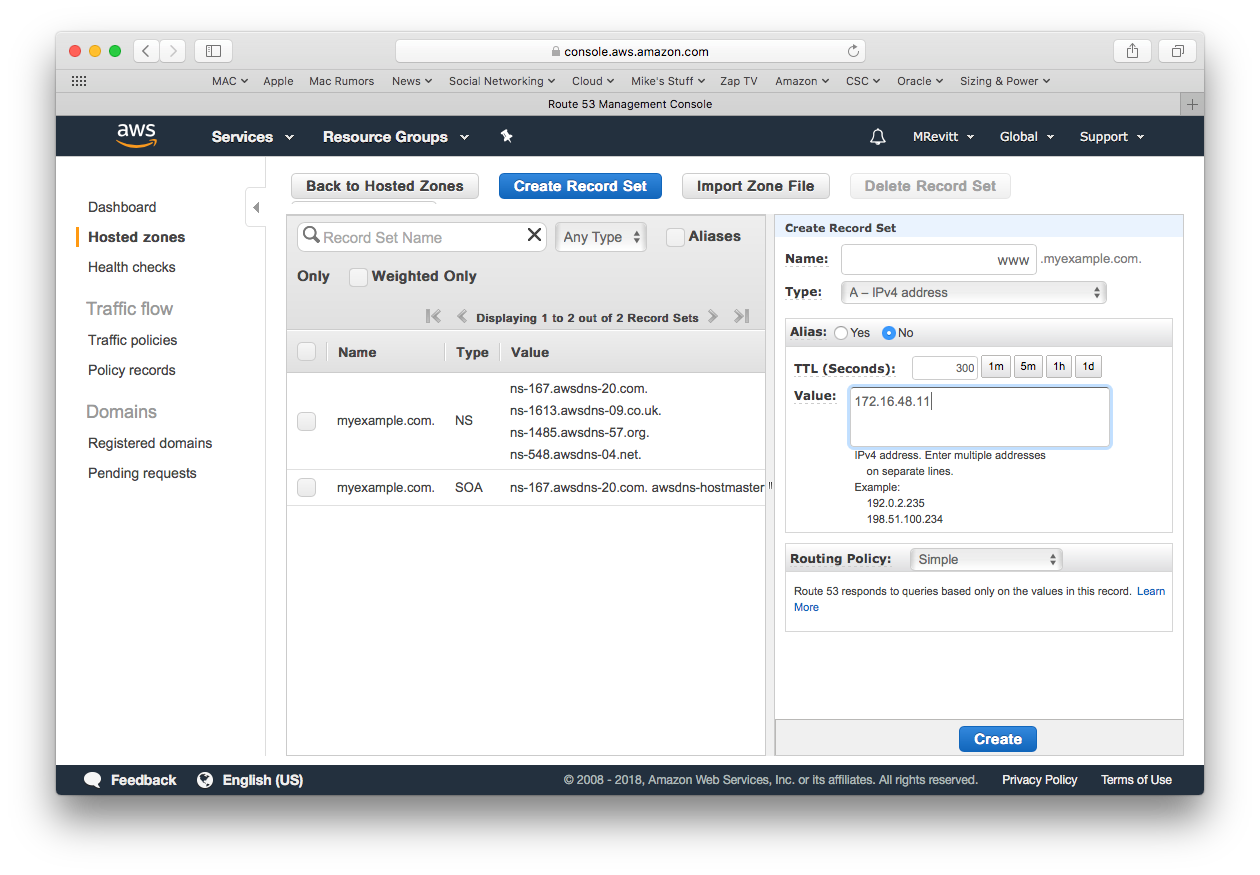
Create an A Type Record Set, by pressing the Create Record Set button
Enter the name as www, and the external IP address of your website in the Value box and then press Create
This completes the Route 53 entries, which should look like this
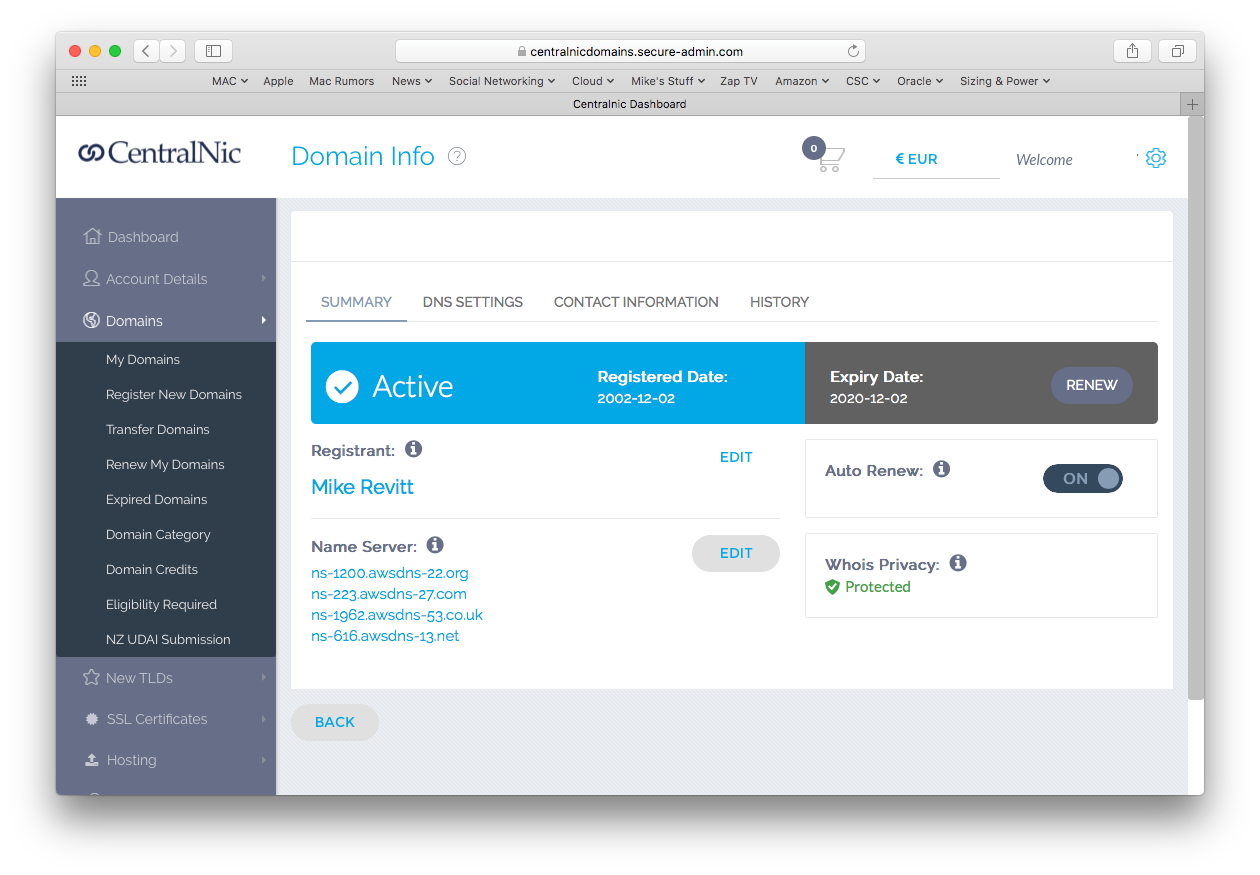
Update Domain Registrar
Now that you have created some DNS rules in Route 53, you need to tell your Domain Registrar how to locate your WEB site.
CentralNic is the registrar for my domain, and is what I will be using to demonstrate what needs to be modified.
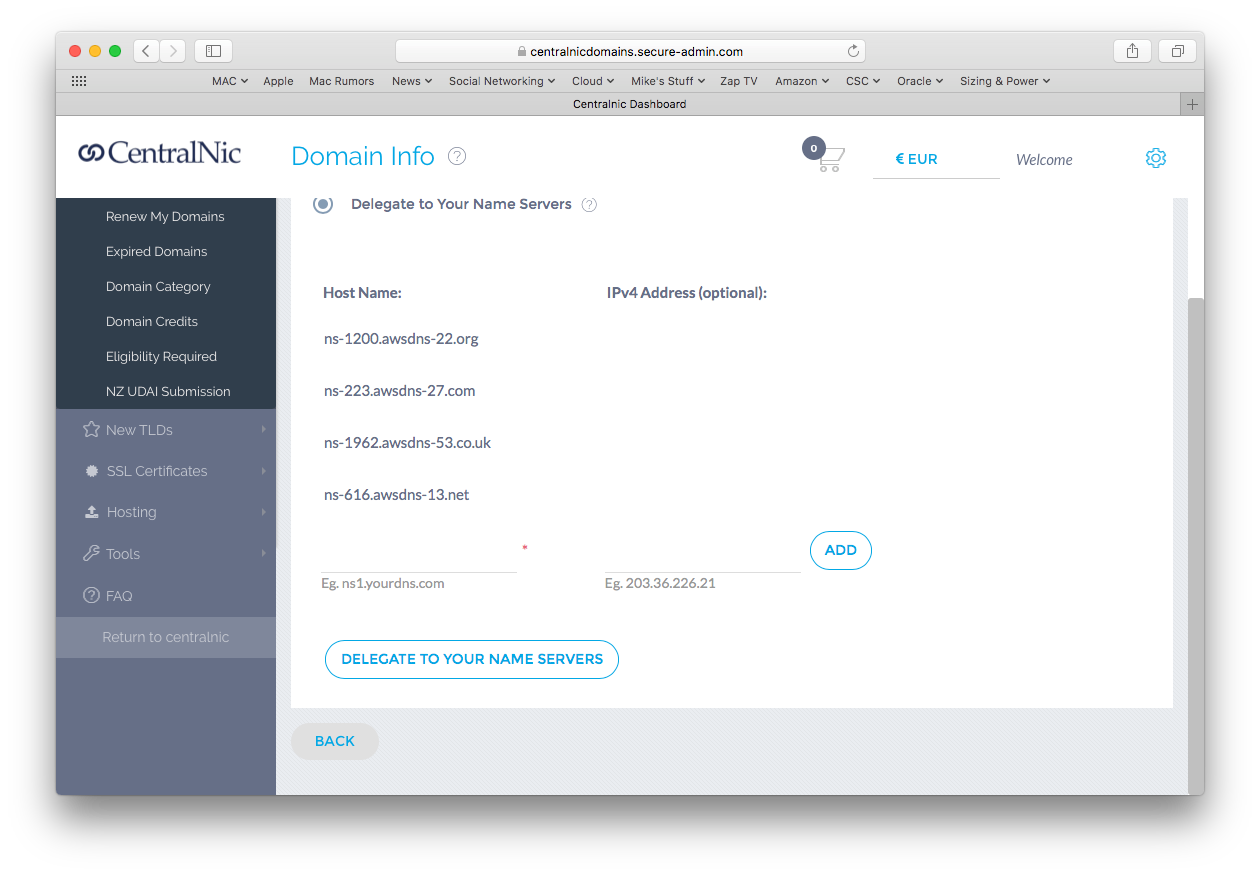
Once You have logged onto your Registrar’s Dashboard, go to the section where the Name Servers are recorded, these all need to be modified to match the name servers in the NS Record set of the Hosted Zone we created earlier.
In Central Nic, you click the EDIT button and modify the names as required
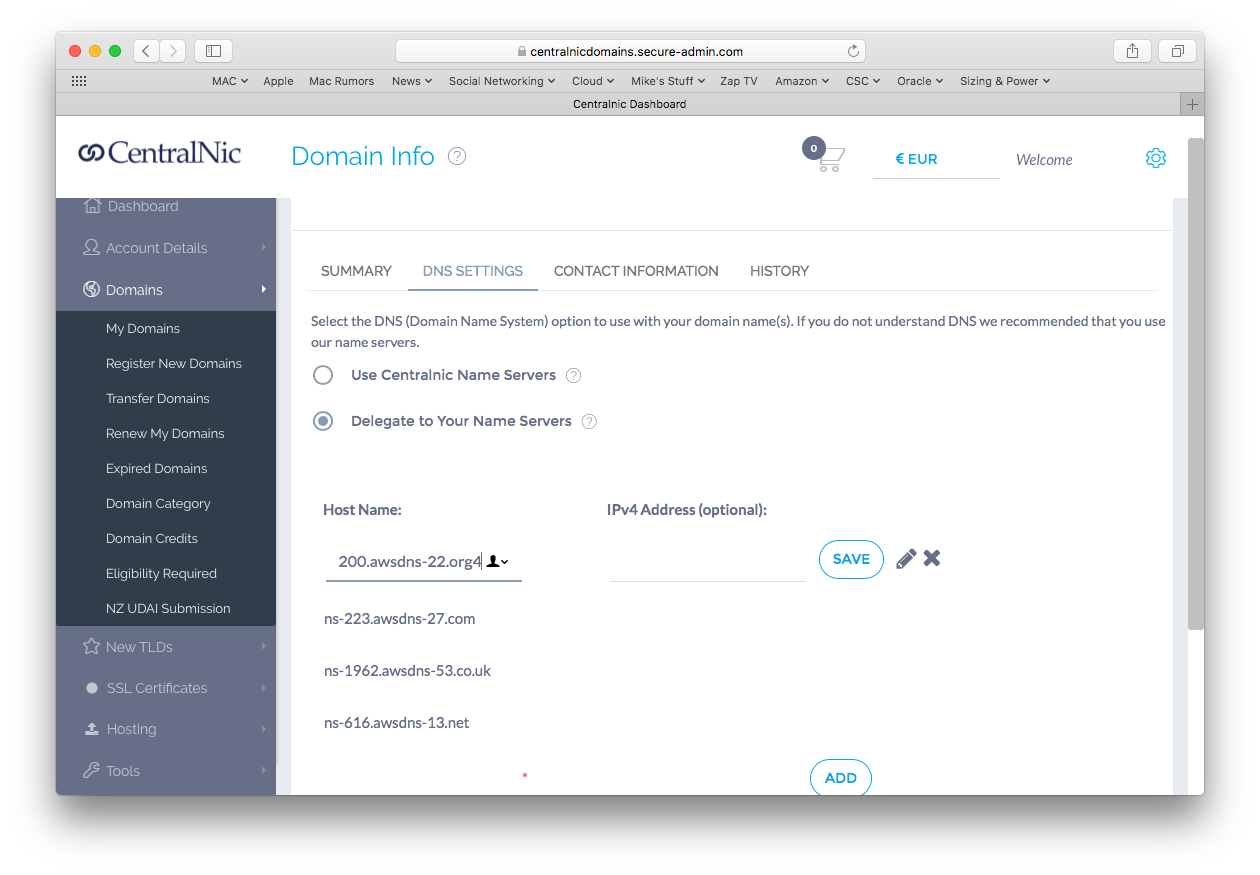
The Gotcha I found in Central Nic is that you MUST press the Delegage to Your Name Servers button once you have finished making your changes to make them permanent.