MacOS 10.14 Mojave
Creating a MacOS 10.14 Mojave USB Boot Drive
Back in the day when we bought OS X on discs, as long as you kept that disc, you always had a bootable installer just in case. Modern, downloadable versions of OS X create a recovery partition on your drive, but it's always a smart idea to make your own bootable installer drive too.
I recommend making one for Mojave, on a USB thumb drive: If you want to install Mojave on multiple Macs, using a bootable installer drive can be more convenient than downloading or copying the entire installer to each computer. If you want to erase the drive on a Mac before installing Mojave or start over at any time, you can use a dedicated installer drive to boot that Mac, erase its drive, and then install the OS clean and restore whatever data you need from a backup. And if your Mac is experiencing problems, a bootable installer drive makes a handy emergency disk.
Keep the installer from being deleted
Like all recent versions of OS X, Mojave s distributed through the Mac App Store, if you leave the Mojave installer in its default location (in the main Applications folder) when you install OS X 10.14, the installer will delete itself after the installation finishes. If you plan to use that installer on other Macs, or in this case to create a bootable drive, be sure to copy the installer to another drive, or at least move it out of the Applications folder, before you install. If you don't, you'll have to re-download the installer from the Mac App Store before you can create a bootable installer drive.
Create the Mojave install drive
Starting with Mavericks, hidden inside the OS X installer is a Unix program called createinstallmedia, provided by Apple specifically for creating a bootable installer drive. If you're comfortable using Terminal, createinstallmedia is a relatively simple tool to use.
To create your copy of a Mojave Installation USB drive, follow these steps:
- If you don't already have the Install macOS Mojave application, download it via the Mac App Store.
- When the download completes, your Mac will launch it. Quit the installer, and instead locate it in your /Applications folder. If you'd already placed it somewhere else on your computer, move it back to the Applications folder. It's also simpler to leave the file name as is: Install macOS Mojave.app.
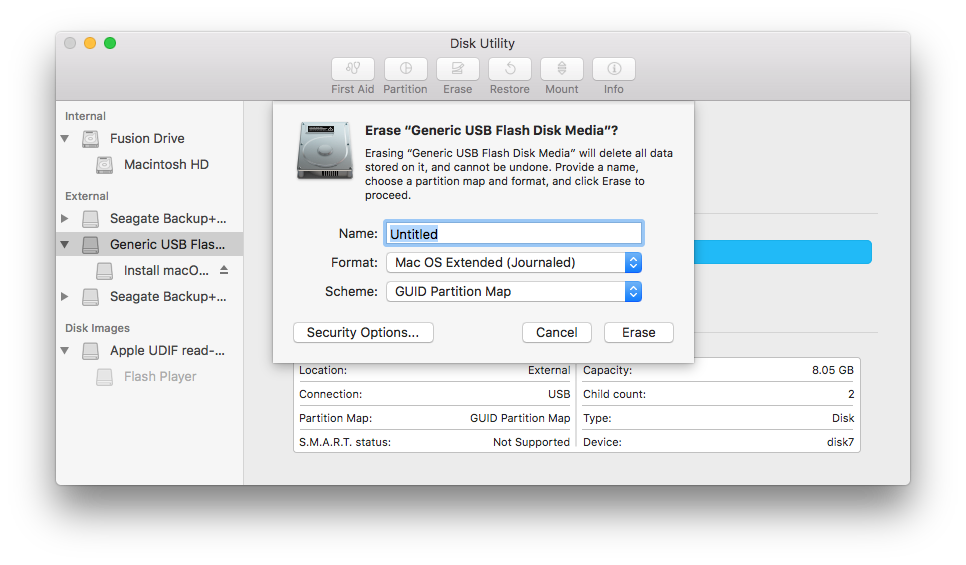
- Insert your >=8GB drive. If it isn't formatted to GUID Partition Map and Mac OS Extended (Journaled), you can launch the Disk Utility application and format it from there. This will wipe all data from the drive.
- The Terminal command used here assumes the drive is named Install, rename the newly formatted USB drive to Install and also make sure the Mojave installer, called Install macOS Mojave.app is in its default location in your main Applications folder. This means that if you moved it before installing Mojave you need to move it back before making your installer disk
$ ls /Volumes/
Install		Macintosh HD	TimeMachine	iTunes

$ ls /Applications/Install\ macOS\ Mojave.app/
Contents
- Run the following command which will first format the drive, then create a Mojave boot/install image on that drive
- If you would like to be asked for confirmation before erasing the drive, remove "--nointeraction" from the above command
- The "--downloadassets" flag is new in macOS Mojave. It downloads assets which may be required during installation. This is presumably helpful for faster or offline installations, as it won't require downloading during installation. However, the above command will still function without this flag if you prefer.
- Previous versions of macOS used an "--applicationpath" flag in this command. That flag is now deprecated and will throw an error if used. For this reason, use the above command instead of updating the command quoted in guides written for older versions of macOS.
$ sudo Install\ macOS\ Mojave.app/Contents/Resources/createinstallmedia --volume /Volumes/Install/ --nointeraction --downloadassets
Password:

Erasing disk: 0%... 10%... 20%... 30%... 100%

Finding assets to download...
Downloading assets: 0%... 10%... 20%... 30%... 40%... 50%... 60%... 70%... 80%... 90%...

Copying to disk: 0%... 10%... 20%... 30%... 40%... 50%... 60%... 70%... 80%... 90%... 100%

Making disk bootable...

Copying boot files...

Install media now available at "/Volumes/Install macOS Mojave"
You now have a bootable Mojave install drive. If you like, you can rename the drive from its default name of Install macOS Mojave though I tend not to as it makes them easier to find later if you keep the original name.