MacOS 10.12 Sierra Guides >>>
Creating a MacOS 10.12 Sierra USB Boot Drive
Back in the day when we bought OS X on discs, as long as you kept that disc, you always had a bootable installer just in case. Modern, downloadable versions of OS X create a recovery partition on your drive, but it's always a smart idea to make your own bootable installer drive too.
I recommend making one for Sierra, on a USB thumb drive: If you want to install Sierra on multiple Macs, using a bootable installer drive can be more convenient than downloading or copying the entire installer to each computer. If you want to erase the drive on a Mac before installing Sierra or start over at any time, you can use a dedicated installer drive to boot that Mac, erase its drive, and then install the OS clean and restore whatever data you need from a backup. And if your Mac is experiencing problems, a bootable installer drive makes a handy emergency disk.
Keep the installer from being deleted
Like all recent versions of OS X, Sierra s distributed through the Mac App Store, if you leave the Sierra installer in its default location (in the main Applications folder) when you install OS X 10.12, the installer will delete itself after the installation finishes. If you plan to use that installer on other Macs, or in this case to create a bootable drive, be sure to copy the installer to another drive, or at least move it out of the Applications folder, before you install. If you don't, you'll have to re-download the installer from the Mac App Store before you can create a bootable installer drive.
Create the Sierra install drive
Starting with Mavericks, hidden inside the OS X installer is a Unix program called createinstallmedia, provided by Apple specifically for creating a bootable installer drive. If you're comfortable using Terminal, createinstallmedia is a relatively simple tool to use.
Just be warned this command can take a while

>As implied above, the createinstallmedia tool works only in Lion, Mountain Lion, Mavericks, Yosemite, El Capitan or Sierra, you can’t create an installer drive this way while booted into Snow Leopard.
To create your copy of a Sierra Installation USB drive, follow these steps:
- Connect to your Mac a properly formatted 8GB (or larger) drive, and rename the drive Untitled. (The Terminal command used here assumes the drive is named Untitled.) Also, make sure the Sierra installer, called Install OS X Sierra app is in its default location in your main Applications folder (/Applications). This means that if you moved it before installing Sierra you need to move it back before making your installer disk.
- Select the text of this Terminal command and copy it:
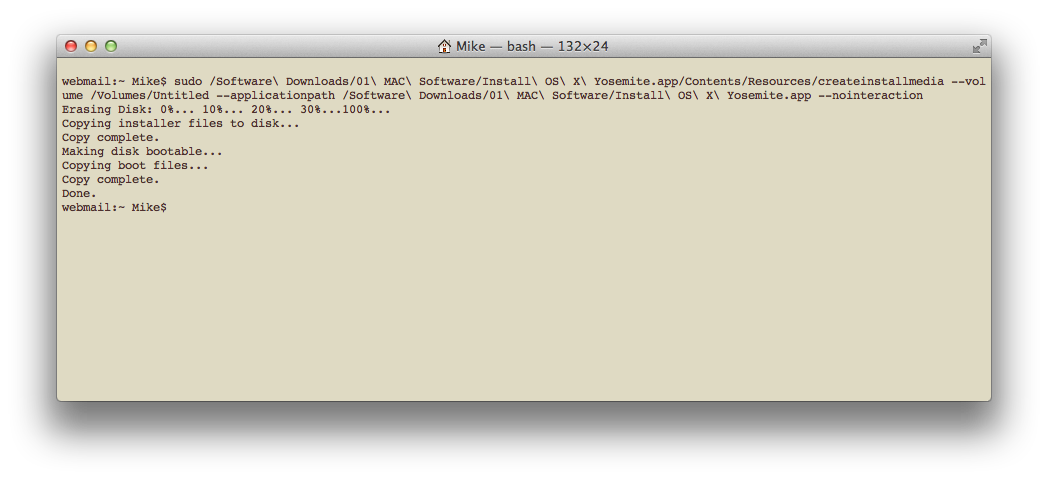
$ sudo /Applications/Install\ OS\ X\ Sierra.app/Contents/Resources/createinstallmedia --volume /Volumes/Untitled --applicationpath /Applications/Install\ OS\ X\ Sierra.app --nointeraction
- Launch Terminal (in /Applications/Utilities).
- Warning: This step will erase the destination drive or partition, so make sure that it doesn’t contain any valuable data. Paste the copied command into Terminal and press Return.
- Type your admin-level account password when prompted, and then press Return.
- The Terminal window displays the progress of the process, in a very Terminal sort of way, by displaying a textual representation of a progress bar: Erasing Disk: 0%... 10 percent...20 percent... and so on. The program then tells you it’s copying the installer files, making the disk bootable, and copying boot files. Wait until you see the text Copy Complete. Done. (see the screenshot above), which could take as long as 20 or 30 minutes, depending on how fast your Mac can copy data to your destination drive.
You now have a bootable Sierra install drive. If you like, you can rename the drive from its default name of Install macOS Sierra though I tend not to as it makes them easier to find later if you keep the original name.